
 Lenovo Golden Key V3.5.60 - DMI EDITOR

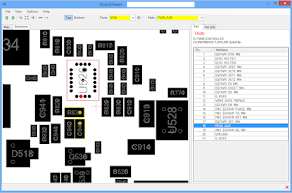
Lenovo Golden Key V3.5.60 - DMI Editor is a tool designed to modify DMI (Desktop Management Interface) information on Lenovo computers. DMI stores critical system details such as the serial number, product name, UUID, manufacturer, and BIOS version. This tool is primarily used by technicians or advanced users to repair, restore, or customize DMI data on Lenovo systems.
Common Use Cases
Repairing Corrupted DMI Data: Restores corrupted DMI information to resolve boot or hardware identification issues.
Customizing System Information: Allows modification of system identifiers (e.g., serial number, product name) for specific use cases.
Cloning Systems: Ensures unique identifiers like UUIDs are correctly configured when cloning multiple systems.
How to Use Lenovo Golden Key V3.5.60 - DMI EDITOR
Preparation
Download: Lenovo Golden Key V3.5.60
.png "Lenovo Golden Key V3.5.60 - DMI EDITOR DOWNLOAD FREE")
Extract: Extract the downloaded files to a folder on your computer.
USB Requirements:
Use a USB drive formatted as FAT32.
Backup existing data on the USB drive (formatting may be required).
Steps to Create Bootable USB
Launch U1 Update Tool:
Run u1.exe from the extracted files.
Connect the FAT32-formatted USB drive.

Generate Bootable Media:
Click Run to copy U1 tool data to the USB drive.
Note: Existing data on the USB drive will not be deleted.
Internet Connection: Ensure an active internet connection during this process (required for downloading dependencies).

Booting the Target Laptop
Disable Secure Boot:
Enter the BIOS/UEFI settings (typically by pressing F1/F2/Del during startup).
Disable the Secure Boot option.
Boot from USB:
Insert the prepared USB drive.
Boot the system from the USB (may require changing boot order in BIOS).
Follow On-Screen Instructions: Use the tool’s interface to modify DMI data or perform repairs.


Main Menu Differences
For Desktops, IdeaPads, and Lenovo Laptops:
Select MTM...Flash Tool to access a command-line interface (CLI) for DMI editing.

For ThinkPads:
Selecting MTM...Flash Tool launches the ThinkPad Maintenance Utility, a GUI-based tool for DMI management.


File Password?
ReplyDeletePassword is indiafix
Delete